
One of the first and more annoying problems you’ll probably run into as you grow microgreens is mold. You can treat mold, but preventing it in the first place is even better.
Microgreens go moldy because you’re created an environment perfect for fungus and other microorganisms.
To prevent fungus growth, you want to reduce the initial pathogen populations as much as possible: sterilize your seeds, use clean soil; and create the best conditions to favor vegetative growth over fungus (temperature between 20C (68F) and 25C (77F), humidity under 60%, and good airflow.)
Cut out moldy areas, or spot treat with a dilute solution of peracetic acid or hydrogen peroxide (1 tbsp (15mL) per pint (500mL)). Consult your local, state or provincial, and federal health authorities for official guidelines.
Create unfavourable conditions for mold growth
Seeds
If seeds fail to germinate, they may not be fresh, or may have been stored improperly. Poor germination can lead to mold, as the un-germinated seeds will begin to decompose when they’re hydrated. Sterilize seeds by soaking in a sanitizing solution (discussed below), and test the germination rates to prevent this.
Watering
Overwatering can cause microgreens to go moldy. Too much water creates an anaerobic conditions, roots die, and pathogens take over. Squish soil in your hand lightly, there should be some compression before any water comes out. If water squishes out right away all the pore space is saturated. There’s no room for air. This can lead to mold. Make sure your trays are draining properly, and don’t overwater.
Use trays with drainage holes, nested in a solid tray. Growing straight in a solid tray can trap more water in the soil. Consider adding perlite to help the soil drain, and keep it lighter.
Temperature
If your temperatures get much higher than 25C, fungus and bacterial growth will increase rapidly. If your temperature drops below 20C, water can take longer to evaporate, and the stagnant water can harbor microbial colonies. So if I were you, I’d keep temperatures between approximately 20 and 25C for indoor microgreens.
For outdoor growing it’s a bit of a different situation. Outdoors, microbes are much more balanced, and they have all kinds of natural predators. The circle of life keeps them in check and generally in balance, so a wider range of temperatures works.
Ventilation
Ventilation is critical. Moving air helps dry up stagnant water, and keep mold growth down as the humidity right at the surface of the soil, and on shed seed hulls is lower. The moving air transports moisture away from material that can mold and grow bacteria.
Humidity
Closely coupled with ventilation, humidity. Monitor your humidity levels as well. If you’re from a coastal region, or somewhere with high humidity for another reason, keep an eye on it. There are lots of cheap humidity meters out there that work well enough. Keep humidity below 60% if possible.
Contaminated soil
Use sterile soil if available. No soil is truly sterile, but use the highest quality soil you can find. Composting soil properly kills off the majority of pathogens. When composting, the soil heats up, You can find the USDA composting guidelines and some tips and tricks in this article I’ve written:
It goes into more depth on composting, and how to prevent issues.
Hygiene and Sanitation
Start at the level of hygiene and sanitation you plan to reach so your systems are built from the start. Then there’s no adjustment or re-training period for staff if you unlock a new market. A higher level of sanitation could be easier to operate in the long-run, as often the rules are designed to work well for operations at scale. Some of the rules will definitely seem needlessly complicated, but there are some positive side-effects.
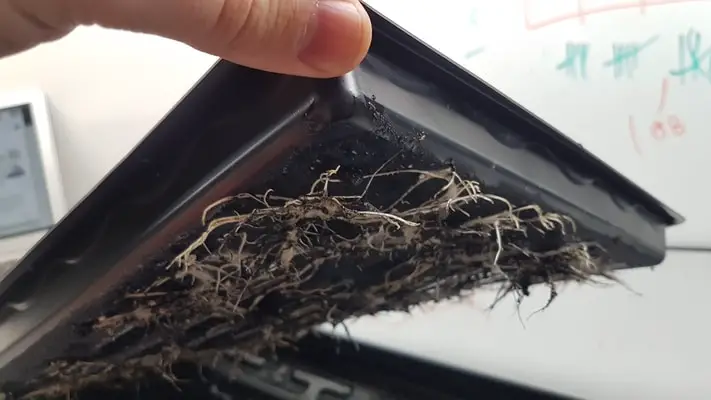
Pictured above are the roots from a harvested microgreen tray. Have a system for cleaning your trays, and stick with it. Keep good records so you can track down the cause of problems.
For example careful tracking of batches is a common regulatory requirement. It can allow you to run micro-experiments. You could alternate lighting or watering, or other variables between batches through time, then track sales numbers and performance (is the product staying fresh longer in-store?) Ask your customers how long the product is keeping, and do some measurement on your own.
Sanitize tools and equipment between batches
All tray should be sanitized, through wiping down after every use. Keep records of who is sanitizing. If you’re working in a team, keep records of who is doing what, so problems can be tracked and addressed with training.
Work surfaces should be sanitized, and kept free of debris. Wiping is better than brushing or spraying. Brushing can kick up dust into the air, that can settle. And spraying can increase the humidity, and lift little particles into the air.
Harvesting tools like knives or scissors should be sterilized between uses. Wipe down with rubbing alcohol, bleach, hydrogen peroxide, or a commercial disinfectant.
Wash before use vs ready to eat
Some products are labelled washed before use, while others are marked ready-to-eat. Ready-to-eat products will have stricter regulatory requirements.
What to use as a sanitizer
There are a few food-safe options for sanitizing. Direct application to food versus tools and equipment will have different requirements. Applying disinfectants directly to food requires that the compounds break down quickly and don’t leave any harmful residues. Another consideration is what is acceptable for organic classification.
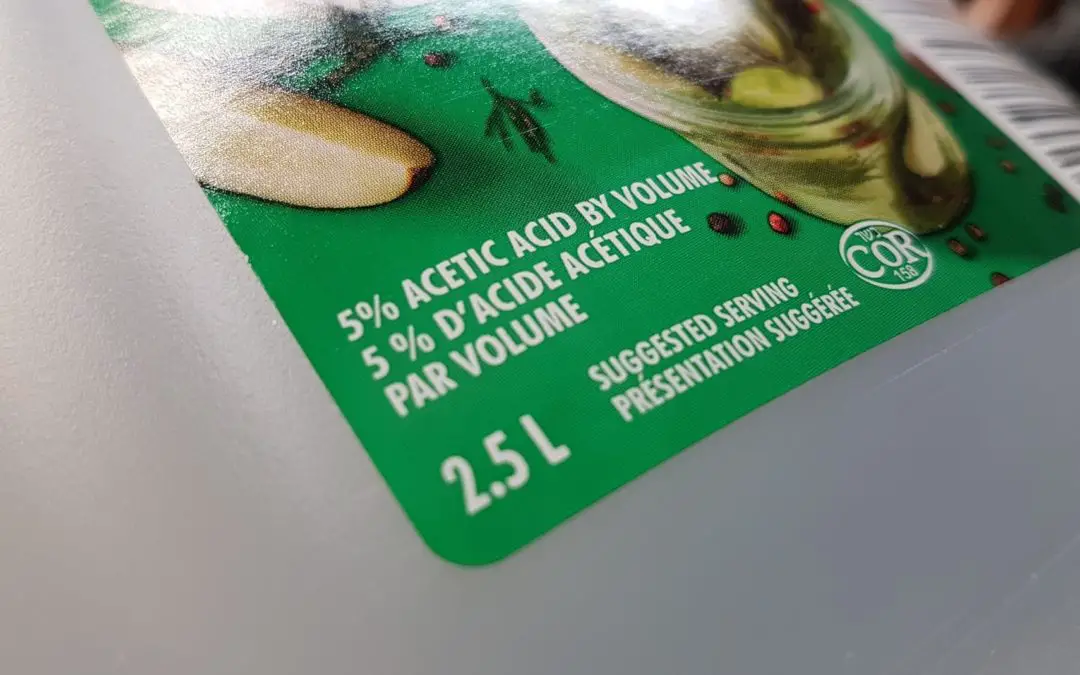
Peracetic acid is extremely reactive. Made from a mixture of acetic acid (vinegar) and hydrogen peroxide. It doesn’t leave harmful residues because it has fully reacted before we eat the greens. There will be different concentrations specified in the regulatory material for direct application vs tools and equipment. I could re-post it here, but it’s best if you go straight to the government source in your jurisdiction. Peracetic acid is so reactive that it’s fine for use on USDA certified crops, no residues are left behind.
A hydrogen peroxide and water mixture is another option. Hydrogen peroxide reacts quickly, and doesn’t leave any harmful residues. Check your hydrogen peroxide for the expiry date (see photo below), and try to use it within a few months of opening. Don’t buy huge quantities that will take you a long time to use.

Sodium hypochlorite bleach can be used, but there are certain restrictions. Follow the manufacturer’s directions and any regulations.
Is apple cider vinegar an appropriate sanitizer? It depends on your scale, and your personal standards. Large government bodies will likely not consider apple cider vinegar to be an acceptable sanitizer.
Ultimately it depends on what your local health inspector says. It’s worth making a phone call, to avoid headaches in the future. You can always use a fake name and contact info on the call to avoid any follow up.
Overall, it’s good to demonstrate to inspectors that you’re knowledgeable. A little reading can go a long ways. They’re likely to ask less questions and cause you less problems if you’re familiar with the regulations, and speak the speak.
Sanitizing standards
Sanitizing standards at home
If you’re doing food products at home it’s really up to you. Keep your kitchen and utensils clean to your own standards. But keep in mind, microgreens can be a health risk if not properly managed.
Selling to the Public
Your sanitization standards need to be more strict as you scale up your operation. As you feed more and more people, there are more and more people at risk, and more government bodies become interested in your operation. The most important thing is to be transparent and honest with your customers, and take the time to the understand the requirements.
Farmers Markets
If you’re selling at a local farmer’s market, ask them what their policies are. They’ll probably have some basic requirements, but often all you need is to follow basic food safe principles, and keep everything clean.
It’s a good idea to include a little sign on your stand that communicates to customers that your products were not prepared in a commercial kitchen. If that’s the case.
Often that’s enough. Ask around, and do your due diligence, and you should be up to speed in no time.
Local shops
Selling in local shops is a little more formal. Often farmer’s markets are a bit of a special case when it comes to regulation. Once you’re in a shop, you’ve made the jump to commercial, and all the commercial rules apply.
Seek out your regulatory body, you may have municipal requirements, but probably also state/provincial, and possibly federal (USDA in the US, or Health Canada and the Canadian food inspection agency).
Labelling requirements probably come into play if you’re selling in a local shop. Things like a harvest date, or best before, and enough info to track the batch of product back to you and your facilities if there’s a recall or an issue.
Selling across state or provincial borders
National requirements come into play once you’re selling across provincial borders. You’ll have to tighten up your operation, and may be subject to inspection by federal regulatory bodies. This is where you’ll really have to have your ducks in a row.
If you’re selling in two or more regulatory areas (Cities, states, etc.), you’ll have to review all the rules for each area. It’s easiest to set up your operation to operate to the strictest one. Instead of trying to micro-manage requirements, training, labelling, and everything else for multiple jurisdictions. You might need different setups if rules conflict, but chances are labels are the only change you might have to make.
International
If you’re selling internationally, it’s time to roll up your sleeves, and embrace your new station in life: under a large pile of paperwork.
Selling internationally is something I’ve had experience with in a non-food, non-farming business. But I haven’t sold microgreens internationally. I don’t know that too many people will be doing this.
One of the biggest benefits of microgreens is that they’re freshly harvested, and nutrient dense, right now! I’d be really interested to hear about situations where selling internationally makes sense.
Conclusions
- Microgreens go moldy because you’re created an environment perfect for fungus and other microorganisms (oh no!)
- Increase drainage in your growing medium. Use more perlite for soil mixes, and if you’re using a tray without drainage, switch to one with holes in the bottom. Bottom water instead of top watering.
- To prevent fungus growth, you want to reduce the initial pathogen populations as much as possible. Pathogens can come from your trays, your soil, your seeds, or neighboring microgreen trays.
- Sterilize your seeds by soaking in a 1 tbsp (15mL) of hydrogen peroxide per pint (500mL) of water solution, add 1 tbsp (15mL) of white vinegar to create peracetic acid, an even more potent sanitizer.
- Use clean soil, sterile or properly composted if available. This is a huge priority. You can bake your soil in the oven if it’s causing problems (330F for 2.5 hours).
- Give your plants favourable growing conditions (temperature between 20C (68F) and 25C (77F), humidity under 60%, and good ventilation). to favor vegetative growth over fungus.
- If you find mold: cut out moldy areas, or spot treat with a dilute solution of peracetic acid or hydrogen peroxide (1 tbsp (15mL) per pint (500mL)).
- Make sure you’re following the most relevant rules. Health inspectors will hold you to a higher and higher standard as the size of your operation grows.

I’m Alex Lafreniere. I learned a lot about plants when I built and operated a landscaping company. But, there’s always more to learn. Ever since travelling across the world, I’ve wanted to find ways to bring more tropical and exotic plants into my life. This is the site where I share everything I’ve learned with you.
This site is owned and operated by Plant Hardware, a sole proprietor headquartered in Calgary, Canada. Plant Hardware is a participant in the Amazon Services LLC Associates Program, an affiliate advertising program designed to provide a means for sites to earn advertising fees by advertising and linking to Amazon.com.Plant Hardware may also participate in affiliate programs with Bluehost, Clickbank, CJ, ShareASale, and other sites. Plant Hardware is compensated for referring traffic and business to these companies.